If you are working with arduino, you must know about the BOOT LOADER of arduino. When you buy ATMEGA chips those are coming with boot loader and without boot loader. If it is with boot loader no issue. You can programme the IC directly. But if it is without the boot loader , you have to burn the boot loader. Remember that most of ICs with boot loader are bit expensive than without boot loader.
You may think that why these ICs are coming without boot
loader if the IC is not working without boot loader. The biggest thing is the
cost. Think that when you purchase a Chip (ATMEGA 328) the price of the IC is
about USD 1.5. But if the manufacture itself is going to upload the boot
loader, they have to connect all the ICs in to a device to upload the boot
loader. It will take a more time and they have to invest more money to the
devices as well.
Therefore, the best way to let the end users to upload the boot
loader.
In this tutorial, I will explain you the way of burning boot loader for well known ATMEGA328 IC using
- Arduino Uno
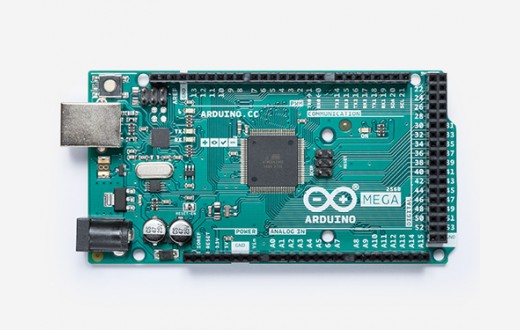
- Arduino Mega
- On bread board
The thing you should understand that, if you want to update boot loader, you must have atleast one Arduino board and ATMEGA chip with boot loader.
- With two Arduino Uno boards
In this method you must have two Arduino Boards
- Arduino Boards = 2 Nos
- Atmega 328 with boot loader = 1
- Jumper Wires
STEP 01
Install the Atmega 328 with boot loader IC to the Arduino Uno board and Connect the Arduino Uno to PC
STEP 02
Run Arduino Software and Files > Examples > ArduinoIsp > ArduinoIsp
STEP 03
Select from Tools > Board > Arduino Genuino/Uno
STEP 04
Select from Tools > Programmer > ARISPMkll
STEP 05
Select from Tools > Port > Relevant port
STEP 06
Now upload the programme from Sketch > Upload
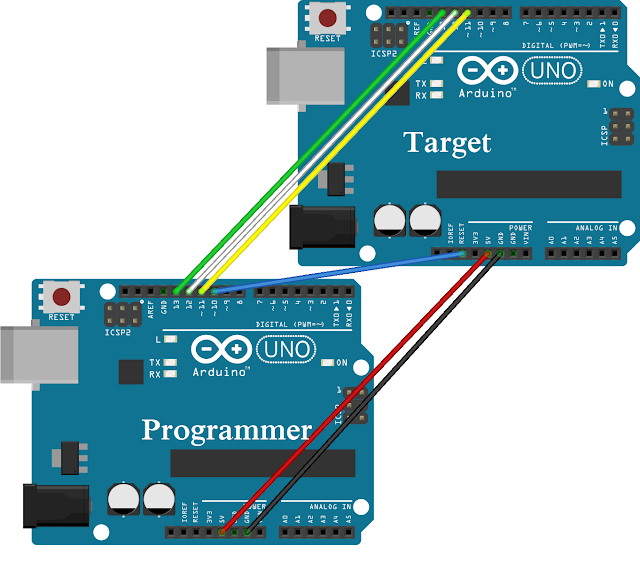
Once the upload is completed you have to connect the ARduino Uno board (Programmer) with 2nd arduino board (Target board) with the chip without Boot loader.
Wiring connectors as follows
Programmer | Target Board |
+5v pin | +5v pin |
GND Pin | GND Pin |
Pin 13 | Pin 13 |
Pin 12 | Pin 12 |
Pin 11 | Pin 11 |
Pin 10 | Reset |
Once the wiring is over ,
Go to Tools > Programmer > Arduino as ISP
Now to burn the bootloader go to Tools > Burn Bootloader
It will take a time to burn the boot loader, then once the burning is completed you can start programming. But do not forget to change the settings as Tools > Programmer > ARISPMkll.
02. Using Ardduino MEGA

In this, the PROGRAMMER is Arduino Mega and the Target is Arduino Uno.
You need the followings
- Arduino Mega board (as the Programmer)
- Arduino Uno Board
- 10uf Capacitor
- Jumper wires
STEP 01
Connect Arduino MEGA to PC
STEP 02
GO TO TOOLS > BOARD > ARDUINO/GENUINO MEGA OR MEGA 2560
STEP 03
Select the PORT
STEP 04
GO TO TOOLS > PROGRAMMER > AVRISP mkll
STEP 05
GO TO FILES > EXAMPLES >Arduino ISP > ArduinoISP
STEP 06
SKETCH > UPLOAD
Once the upload is completed, you have to connect the Target board with without bootloader IC to the Programmer board which is Arduino Mega.
Wiring Details as Follows
Programmer (MEGA) | Target (UNO) |
+5 V | +5 V |
Ground | Ground |
PIN 50 | PIN 11 |
PIN 51 | PIN 12 |
PIN 52 | PIN 13 |
PIN 10 | RESET |
Connect Arduino Mega reset pin and ground pin using a 10uf capacitor.
STEP 06
Important : Arduino MEGA should be connected to PC
GO TO TOOLS > BOARD > Arduino /Genuino Uno
STEP 07
GOTO TOOLS > PROGRAMMER > Arduino as ISP
STEP 08
TOOLS > BURN BOOTLOADER
Once the burning is completed, you can use the arduino uno (atmega 328) for programming. Only change is when we burning boor loader we connect Arduino Mega but we select the Arduino uno from Board.
Do not forget to change as TOOLS > PROGRAMMER > AVRISP mkll after burning is completed for programming.
03. Single Board Method
What if you have only one board either Arduino Uno or Arduino Mega. So, this is the way to burn boot loader in such a situation.
You need the followings,
- ATMEGA 328IC
- 22pf Ceramic Capacitors x 2
- 16 MHz crystal x 1
- Breadboard
Make the TARGET board as the described in my Arduino on vero board tutorial. The you can burn the IC using either 1st method or 2ndmethod having followed the above steps.
IF YOU HAVE ANY DOUBT, PUT IT IN THE COMMENTS. STAY WITH SetNfix.


Any doubt?
ReplyDelete